")
Reinforcement Detailing Using AutoCAD: Mastering Precision and Productivity in Modern Structural Drafting
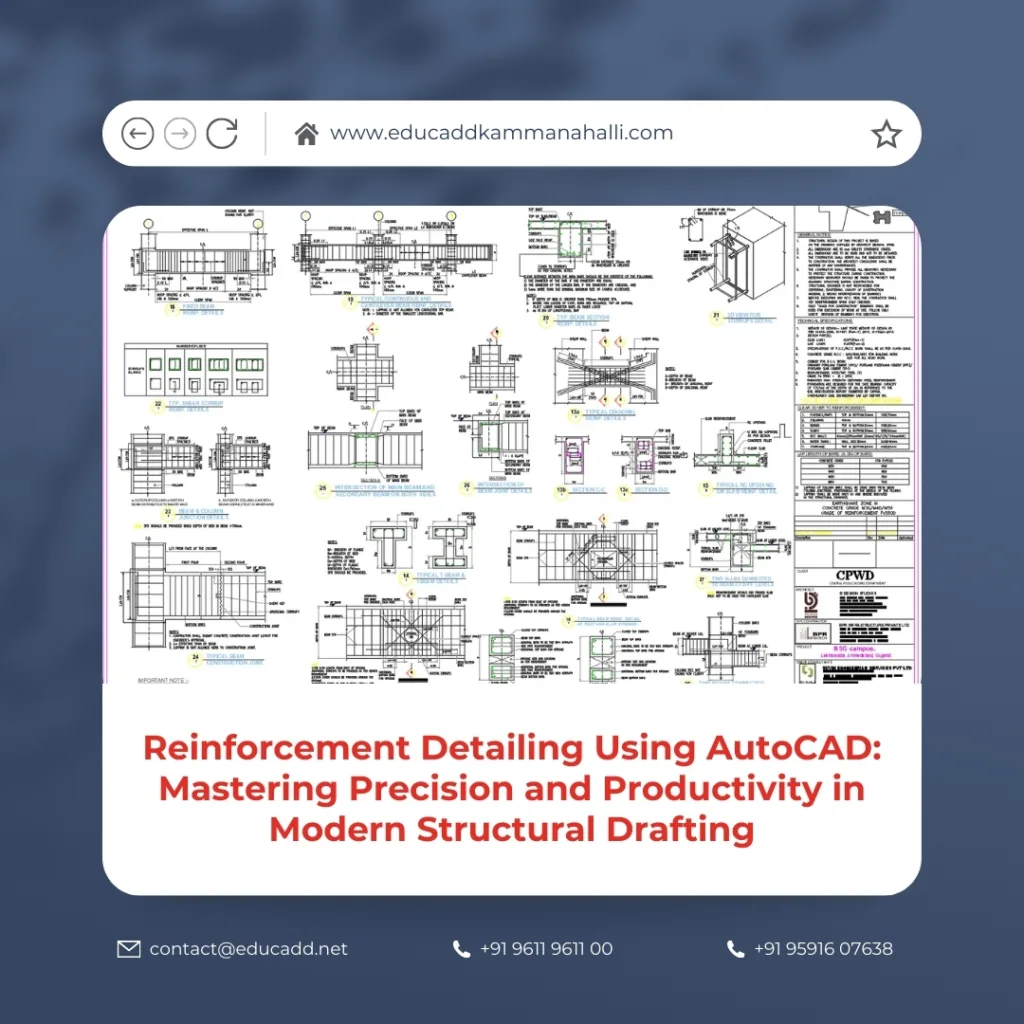
Reinforcement Detailing Using AutoCAD has become a core skill in structural engineering and construction documentation. In today’s competitive construction environment, accuracy and speed define project success. Engineers, designers, and detailers rely on digital tools to prepare precise reinforcement drawings that comply with design codes and site requirements. Among these tools, AutoCAD stands out as a powerful and flexible platform for producing clear and professional reinforcement drawings.
Reinforcement detailing using AutoCAD allows structural professionals to convert design calculations into practical bar bending schedules, section details, and layout drawings. This process ensures that contractors place reinforcement steel correctly in beams, slabs, columns, and foundations. Moreover, it reduces ambiguity and prevents costly site errors. Because reinforced concrete structures depend on proper steel placement, accurate detailing directly influences structural performance and safety.
Reinforcement Detailing Using AutoCAD
This comprehensive guide explores reinforcement detailing using AutoCAD in depth. It explains fundamental principles, drafting standards, workflow strategies, productivity tips, and quality control measures. Each section builds progressively, helping you understand both the technical and practical aspects of reinforcement detailing using AutoCAD.
1. Understanding the Fundamentals of Reinforcement Detailing
Reinforcement Detailing Using AutoCAD forms the bridge between structural design and construction execution. Structural engineers calculate loads, bending moments, shear forces, and deflections. However, contractors require clear drawings that specify bar diameters, spacing, bends, hooks, laps, and anchorage lengths. Reinforcement detailing using AutoCAD translates structural calculations into readable construction drawings.
Before starting reinforcement detailing using AutoCAD, a detailer must understand structural behavior. For example, beams require tension reinforcement at the bottom under positive bending. Slabs need distribution steel perpendicular to the main reinforcement. Columns demand vertical bars with lateral ties. Foundations often require both top and bottom layers of reinforcement.
In addition, knowledge of standard codes is essential. Codes define minimum cover, spacing limits, development length, and bar bending rules. Reinforcement detailing using AutoCAD becomes effective only when the detailer integrates these requirements correctly into the drawing.
Clarity also plays a critical role. Reinforcement drawings must communicate information instantly. Therefore, reinforcement detailing using AutoCAD should focus on line weight control, dimension accuracy, text legibility, and consistent symbols. When executed properly, the drawing becomes a reliable construction document rather than a confusing technical sheet.
2. Why AutoCAD is Ideal for Reinforcement Detailing
AutoCAD offers precision, flexibility, and customization. These features make reinforcement detailing using AutoCAD both efficient and scalable. Designers can create layers for different reinforcement types, such as main bars, distribution bars, stirrups, and dimensions. This layered approach improves drawing organization.
Another advantage of reinforcement detailing using AutoCAD lies in its drafting tools. Commands like LINE, POLYLINE, OFFSET, TRIM, EXTEND, ARRAY, and MIRROR simplify repetitive tasks. For example, stirrups in beams often repeat at fixed spacing. Instead of drawing each stirrup manually, detailers can use the ARRAY command to replicate them accurately.
Blocks also enhance reinforcement detailing using AutoCAD. Standard hooks, bends, and bar callouts can be saved as reusable blocks. This practice reduces drafting time and ensures uniformity across drawings. Moreover, dynamic blocks allow adjustable bar lengths and bend angles without redrawing.
Dimensioning tools further improve reinforcement detailing using AutoCAD. Accurate dimensions prevent fabrication mistakes. With proper dimension styles, detailers maintain consistent text height, arrow size, and spacing across all sheets.
Because AutoCAD supports both 2D drafting and limited 3D modeling, reinforcement detailing using AutoCAD can address various project scales, from small residential buildings to large infrastructure works.
3. Setting Up AutoCAD for Reinforcement Detailing
A proper setup ensures efficiency throughout the project. Reinforcement detailing using AutoCAD begins with configuring units, layers, dimension styles, and text styles. Detailers usually work in millimeters for structural drawings. Therefore, they must set the unit format correctly before drafting.
Layer management plays a vital role in reinforcement detailing using AutoCAD. Each reinforcement category should have a distinct layer. For example:
-
Main reinforcement layer
-
Secondary reinforcement layer
-
Stirrups or ties layer
-
Dimension layer
-
Text and annotations layer
-
Centerline layer
Color coding improves visibility during editing. Later, plot styles convert these colors into correct line weights. Reinforcement detailing using AutoCAD becomes organized and professional when layers remain consistent.
Text styles should remain simple and legible. Avoid decorative fonts. Reinforcement detailing using AutoCAD requires clarity, especially when bar marks and diameters appear in congested areas.
Dimension styles must follow company or project standards. Reinforcement detailing using AutoCAD should include aligned dimensions, linear dimensions, and angular dimensions where necessary. Consistency across drawings builds credibility and reduces confusion during review.
4. Detailing Reinforcement in Beams
Beam detailing represents one of the most common tasks in Reinforcement Detailing Using AutoCAD. A beam typically contains bottom main bars, top bars over supports, and shear reinforcement in the form of stirrups.
To start reinforcement detailing using AutoCAD for beams, draw the beam outline in elevation or section view. Then, insert bottom reinforcement using polylines. Maintain accurate cover from the bottom and sides. After that, add top bars over supports with correct anchorage length.
Stirrups require careful spacing. Structural drawings specify spacing near supports and midspan. Reinforcement detailing using AutoCAD becomes efficient when the ARRAY command distributes stirrups automatically at defined intervals.
Detailers must also add bar marks. Each bar receives a unique identification number. Reinforcement detailing using AutoCAD includes callouts that specify diameter, spacing, and bar length. For example: “3-16Ø Bottom Bars.”
Finally, prepare a bar bending schedule. Reinforcement detailing using AutoCAD often includes tabulated data listing bar mark, diameter, shape, cutting length, and quantity. This schedule helps fabrication teams cut and bend bars correctly.
5. Slab Reinforcement Detailing Techniques
Slabs usually require two layers of reinforcement: main bars and distribution bars. Reinforcement detailing using AutoCAD for slabs begins with a plan view. Designers indicate reinforcement direction clearly to avoid site confusion.
Draw main reinforcement lines in one direction using evenly spaced offsets. Then, draw distribution bars perpendicular to them. Reinforcement detailing using AutoCAD ensures consistent spacing through OFFSET and ARRAY commands.
Openings in slabs require additional detailing. Around openings, extra bars provide structural continuity. Reinforcement detailing using AutoCAD should show trimming bars and edge strengthening clearly.
In thicker slabs or raft foundations, top and bottom layers appear separately. Reinforcement detailing using AutoCAD may include sectional views to clarify vertical spacing between layers.
Clear labeling remains essential. Instead of cluttering the drawing, use leader lines to connect bar notes. Reinforcement detailing using AutoCAD must maintain balance between completeness and readability.
6. Column Reinforcement Detailing
Columns carry axial loads and bending moments. Reinforcement detailing using AutoCAD for columns involves vertical bars and lateral ties. Begin with a column cross-section to show bar arrangement. Then, prepare an elevation to show lap lengths and tie spacing.
Accurate cover is critical. Reinforcement detailing using AutoCAD should reflect specified cover dimensions from structural drawings. Use precise dimension tools rather than approximate placements.
Tie spacing varies along column height. Near beam-column joints, ties remain closer for confinement. Reinforcement detailing using AutoCAD should reflect these variations clearly using dimensions and notes.
Lapping zones require attention. Structural drawings define lap lengths. Reinforcement detailing using AutoCAD must illustrate lap positions without overlapping bars visually in a confusing manner.
Consistency in bar marks across plans and schedules enhances clarity. Reinforcement detailing using AutoCAD becomes highly effective when cross-sections align with elevation details and bar schedules.
7. Footing and Foundation Reinforcement
Foundations transfer loads safely to the soil. Reinforcement detailing using AutoCAD for footings usually involves bottom mesh reinforcement and sometimes top reinforcement near columns.
Start with a footing plan showing bottom bars in both directions. Reinforcement detailing using AutoCAD requires correct spacing and cover from edges. Use offset commands to maintain uniform bar distribution.
Sectional views show reinforcement depth. Reinforcement detailing using AutoCAD should indicate bar diameter, spacing, and development length into columns.
For combined footings or raft foundations, detailing becomes more complex. Reinforcement detailing using AutoCAD must include clear bar layering to prevent confusion. Provide sectional cuts at critical locations.
When detailing pile caps, include anchorage of column bars into the cap. Reinforcement detailing using AutoCAD should also show dowel bars where required.
8. Bar Bending Schedule Preparation
A bar bending schedule translates drawings into fabrication data. Reinforcement detailing using AutoCAD becomes complete only after preparing this schedule.
The schedule typically includes:
-
Bar mark
-
Diameter
-
Shape code
-
Length
-
Quantity
-
Total weight
Detailers often create schedules in AutoCAD tables. Reinforcement detailing using AutoCAD allows linking tabular data with drawing references.
Accuracy matters greatly. A small error in length multiplies across dozens of bars. Reinforcement detailing using AutoCAD should involve double-checking dimensions before finalizing the schedule.
Efficient detailing teams create templates for schedules. Reinforcement detailing using AutoCAD becomes faster when reusable table formats exist.
9. Productivity Tips for Faster Detailing
Efficiency improves profitability. Reinforcement Detailing Using AutoCAD becomes faster with keyboard shortcuts and custom commands. Create custom tool palettes for common reinforcement shapes.
Use blocks for stirrups and standard bends. Reinforcement detailing using AutoCAD gains consistency through reusable elements.
Maintain drawing templates with predefined layers and styles. Reinforcement detailing using AutoCAD saves time when starting new projects.
Regular audits prevent errors. Reinforcement detailing using AutoCAD benefits from peer reviews before submission.
10. Quality Control and Error Prevention
Errors in reinforcement drawings cause major site delays. Reinforcement detailing using AutoCAD must include a structured review process.
Check bar diameters against design drawings. Verify spacing dimensions carefully. Reinforcement detailing using AutoCAD should confirm cover distances in all sections.
Cross-check bar marks with schedules. Reinforcement detailing using AutoCAD must ensure consistency between drawings and tables.
Clarity reduces mistakes. Therefore, reinforcement detailing using AutoCAD should avoid overcrowded annotations.
11. Coordination with Structural Engineers
Reinforcement detailing using AutoCAD requires continuous communication with design engineers. Clarify ambiguous notes before drafting.
If congestion appears in beam-column joints, discuss alternatives. Reinforcement detailing using AutoCAD often reveals constructability issues early.
Maintain revision control. Reinforcement detailing using AutoCAD should document drawing updates clearly to prevent outdated versions on site.
12. Transitioning from Manual to Digital Detailing
Traditional detailing relied on manual drafting. However, reinforcement detailing using AutoCAD improves speed and accuracy significantly.
Digital editing allows quick revisions. Reinforcement detailing using AutoCAD reduces rework when design changes occur.
Cloud sharing enhances collaboration. Reinforcement detailing using AutoCAD integrates well with digital workflows.
13. Career Opportunities in Reinforcement Detailing
Construction demand continues to grow globally. Reinforcement detailing using AutoCAD opens career paths in structural consultancy firms, contracting companies, and detailing agencies.
Skilled detailers command competitive salaries. Reinforcement detailing using AutoCAD also serves as a stepping stone toward BIM and advanced modeling software.
Continuous learning ensures growth. Reinforcement detailing using AutoCAD builds a strong foundation for advanced structural drafting careers.
14. The Future of Reinforcement Detailing
Technology continues to evolve rapidly. Although BIM software gains popularity, reinforcement detailing using AutoCAD remains relevant due to its flexibility and widespread adoption.
Integration with 3D modeling enhances visualization. Reinforcement detailing using AutoCAD can complement BIM workflows effectively.
Automation tools and scripts further improve efficiency. Reinforcement detailing using AutoCAD will continue adapting to industry demands.
Conclusion
Reinforcement Detailing Using AutoCAD stands as a vital discipline in structural engineering and construction documentation. It converts theoretical calculations into practical drawings that guide fabrication and site execution. When detailers apply structural knowledge, drafting standards, and digital efficiency together, they create drawings that prevent errors and enhance construction quality.
Through proper setup, consistent layering, accurate dimensioning, and disciplined review processes, reinforcement detailing using AutoCAD becomes both precise and productive. Moreover, mastering this skill opens valuable career opportunities in the construction industry.
As construction projects grow in complexity, the importance of clear and accurate reinforcement drawings increases further. Therefore, professionals who invest time in refining reinforcement detailing using AutoCAD will remain highly valuable contributors to modern infrastructure development.

